Friday, March 29, 2013

First Pour - Hellfire Deep Red Ale

Great head with good retention and some lacing. Taste is very good and carbonation is just right. A very good brew that I'll look forward to brewing again. This is a Brew Demon recipe.
I really enjoyed the taste of this beer.  Though it might make some good beer bread, so I tried it.  Here's the result:
It is dense and hearty, with great flavor and a nice crust.  Very enjoyable bread!

Wednesday, March 27, 2013

Contest Prize Arrives

Received my contest prize from the recent Brew Demon contest.  It arrived in great condition, packed in a heavy cardboard box.


Inside the shipping box was the Brew Demon box.  Internet orders get the two tone box, while retail units (due out later this year) will feature full color boxes to better grab the attention of shoppers.


And here's the Signature kit.  It includes the conical fermenter and stand, two cans of HME, a stick on thermometer, a vent cap, a bottling wand with hose, plastic mixing spoon, no rinse cleaner and 8 liter plastic bottles with caps.  Not shown are the Brew Demon labels for the bottles, instructions and DVD.

Awesome prize!  Thank you very much Brew Demon.

Monday, March 25, 2013

Bottling Process

The process starts with washed bottles, I didn't bother to photograph this part.  I use OxiClean Free for cleaning the bottles as it lifts out any dried on junk and old labels really easily.  And it doesn't leave a residue behind to affect the beer.


 Bottling Tree and Vinator setup and sanitized with a spray bottle filled with Star-San solution.  I spray down the outside of the bottling wand during this step, by placing it in front of the tree when I sanitize it, saving a step.  Then sanitize the inside of the wand.
 Spigot gets sanitized with a cotton swab dipped in Star-San solution, then the wand carefully attached.  Need to avoid putting too much stress on the spigot as I've read online they are prone to breaking at the base of the threads.  Mr. Beer and Brew Demon use the same supplier for the spigots, so it isn't a vendor specific problem.
 Bottles have been sanitized inside using two pumps each on the Vinator and are placed on the bottle tree to drain.  The Vinator gets the inside of the bottles on the down pump and gets the rim and outside area where the cap crimps on the release.  A great time saver and both accessories are highly recommended to make bottling easier!
  Line up the bottles 6 at a time to receive priming sugar.  This sugar will be consumed by the yeast providing the carbonation for the beer.  The funnel and the measuring spoon have been sanitized then dried so the sugar won't stick or clump in either, which would throw off the measurement leading to inconsistent carbonation.  Each 12 oz bottle gets 1/2 teaspoon of sugar.  This is less than the guidelines from Mr. Beer and Brew Demon, both of which lead to over carbonation.
Even using the conical fermenter, it is possible to get trub in the bottles.  Using a slower fill rate will minimize this.  If I had space in the fridge that would accommodate this (with the attached air lock) that might help move the trub that settles near the spigot.  It will settle out when the bottle is put in the fridge before drinking, so it isn't a concern.


 Filled bottle, just about to be capped using the Super Agata bottler.
 Another bottle just after capping, and the finished batch of beer to the right.  Got 21 bottles out of this one, which is just about where it should be.

Not the prettiest picture, but this is what remains in the fermenter after bottling.  There is a bit of beer left that can't be bottled, under that is the trub, or sediment and dead yeast from fermentation.  Along the walls is some trub that clung to the sides and some krausen (foam) which was produced during fermentation.  This all has to be thoroughly cleaned out to prevent any infections in the next batch of beer.


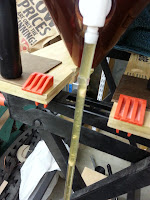
Here's a close up photo that shows the trub at the bottom of the conical and some accumulated around the spigot.  The conical does a good job of getting most of it away from the spigot and leaves a very small surface area exposed to the beer.  I'll starting to elevate the front for future batches trying to further reduce the amount near the spigot so I can fill the bottles faster.


A small sample drawn from what was left in the bottling wand.  Tasted like warm, flat beer, with a hint of a cidery (dry) after taste.  This will condition out and should be ready for Cinco De Mayo.

Monday, March 18, 2013

Won a Brew Demon Premium Kit

Just found out a won a contest Brew Demon was hosting on their Facebook page.  It was a video contest using the cut up LBKs from their Trade Up promotion.  My daughter and I made a video for it and won (doesn't hurt that no one else entered).  There will soon be a Brew Demon Premium kit headed my way.  Thank you Brew Demon!  For more information on their conical fermenting system, please see Brew Demon.

0005 - Blue Patriot

Started a batch of Blue Patriot (blueberry beer) in the second LDC last night.  I used a pound of Mutton's Light DME instead of the booster.  Have to watch that stuff like a hawk while it boils until you get the hot break.  I thought it broke early and almost had a boil over when it foamed back up again.  Good thing I had the spray bottle of water in hand and was able to knock it back before making a big mess on the stove.  I've heard it is very hard to clean up.  After the hot break, turned off the flame and proceeded with the recipe as normal.  I'll be adding the two cans of blueberries after a week so I don't lose the flavor and aroma during the primary fermentation.  Here's the Qbrew details:


Blue Patriot
------------
Brewer: James
Style: Fruit Beer
Batch: 2.13 galExtract

Characteristics
---------------
Recipe Gravity: 1.058 OG
Recipe Bitterness: 15 IBU
Recipe Color: 5° SRM
Estimated FG: 1.015
Alcohol by Volume: 5.6%
Alcohol by Weight: 4.4%

Ingredients
-----------
Mr. Beer/Coopers Patriot American Lager1.87 lb, Extract, Extract
Muntons DME - Light           1.00 lb, Extract, Extract
Oregon Fruit - Bluberries     1.88 lb, Adjunct, Other

Mr. Beer/Coopers Patriot American Lager1.00 oz, Pellet, 5 minutes

Mr. Beer Dry Ale Yeast        1.00 unit, Yeast, Temperature Range: 68°-76° F   2.0 GRAMS

Notes
-----
Recipe Notes:
Blueberries added after 1 week of fermentation.

Batch Notes:

Update: 2013/03/19:
Took this video last night.  Shows just how active the fermentation is after only 24 hours.  The yeast is having a part in there!


Updated: 2013/03/06: 
Lots of trub due to all of the blueberries. Was able to fill 23 bottle at a moderate rate and avoided getting too much in each bottle. Blueberry flavor was very subtle, was hoping for a bit more as I added it at 10 days instead of 7. Slightly cidery due to the fruit sugars but not as bad as the Cherry Wheat. Should be ready in about 6 weeks or so. My daughter enjoyed helping with the bottling proceed. She likes the science behind the brewing proceed.

Friday, March 8, 2013

First Pour - Classic American Light

Realized I never posted a photo of the Classic American Light first pour.  Color was good, taste was good, no head and very little carbonation.  The last two I expected as I messed up with the priming sugar and used less than half of what I should have.  As the remaining bottles have been conditioning longer, the carbonation is getting better.  I didn't think the 1/2 liter bottle would fit in the glass, so I used two.

Customer Service

Wanted to send out a few kudos to both Mr. Beer's customer service as well as Brew Demon's customer service.

First, Mr. Beer.  Had an issue with the LBK during my first brew, it leaked around the seam where the spigot is.  They replaced the LBK after I sent them a photo showing the raised seam preventing a good seal. They also replaced a packet of booster that was punctured during shipping.  Quick and fair resolutions to both issues, I will certainly order from them again.  Thank you Mr. Beer customer service!

Now for Brew Demon.  Had an unusual experience brewing the Hellfire Deep Red Ale Plus recipe (detailed in that blog post).  Contacted customer service and they are replacing the refill indicating what I experienced isn't normal (should have taken pictures of the issue).  They are going to brew up that refill as well, to ensure a quality product.  Then I took them up on their "Trade Up Promotion".  It apparently was more successful then they expected and there was a slight delay getting my order out.  To make up for the delay, they upgraded part of the order.  I love it when companies are proactive like this, as I'd not complained about the delay at all.  Definitely a good way to handle the situation and keep me as a satisfied customer.  Then I noticed an item in that order had been damaged in shipping.  Took photos this time to help them see what I had encountered when I opened the box.  Let them know of the issue, and also said since I was ahead of the game due to the upgrade I'd already been given, that I'd leave it up to them whether or not to replace it.  I was already a happy camper and wanted to inform them of changes they could make when packing shipments.  They are replacing the item anyhow.  What an amazing company and they will certainly be getting future business from me.  Thank you Brew Demon customer service!

Now I just need to brew up the 7 refills I currently have (mix of flavors from both companies) then I'll be ready to order some more.

Sunday, March 3, 2013

0004 - Aztec

Thinking ahead to Cinco de Mayo (May 5, 2013) , I'm brewing up a batch of Mr. Beer's Aztec Mexican Cerveza.  Here's the Qbrew details:

************************************************************


0004 - Aztec Mexican Cerveza
----------------------------
Brewer: James
Style: Generic Ale
Batch: 2.13 galExtract

Characteristics
---------------
Recipe Gravity: 1.032 OG
Recipe Bitterness: 12 IBU
Recipe Color: 2° SRM
Estimated FG: 1.008
Alcohol by Volume: 3.1%
Alcohol by Weight: 2.4%

Ingredients
-----------
Mr. Beer/Coopers Mexican Cerveza1.87 lb, Extract, Extract

Mr. Beer/Coopers Mexican Cerveza1.00 oz, Pellet, 5 minutes

Mr. Beer Dry Ale Yeast        1.00 unit, Yeast, Temperature Range: 68°-76° F   2.0 GRAMS

Notes
-----
Recipe Notes:


Batch Notes:


************************************************************

Brewed this one on 2013/03/02.  Pretty straight forward brewing process.  Didn't add anything to this recipe, want to see how it is straight up and wanted it to be ready for May 5th.  This is in the LDC.  And with this post, the blog is now current with my brewing activity.


Update: 2013/03/23:
Bottled up this batch today.  Now it sits to carbonate and condition until Cinco De Mayo.  I took photos during this bottling session for another post.

0003 - Hellfire Deep Red Ale

This is my first batch made from a Brew Demon kit.  Used the other half of the Mr. Beer booster pack as it was open and I didn't want it to go bad.  Since the database for Qbrew was recently updated to include the malts from this company, I can now see what it says about this brew:

************************************************************

Style: Generic Ale
Batch: 2.13 galExtract

Characteristics
---------------
Recipe Gravity: 1.050 OG
Recipe Bitterness: 11 IBU
Recipe Color: 11° SRM
Estimated FG: 1.012
Alcohol by Volume: 4.8%
Alcohol by Weight: 3.8%

Ingredients
-----------
BrewDemon™ Hellfire Deep Red Ale1.21 lb, Extract, Extract
BrewDemon™ Red Horse Mellow Amber1.21 lb, Extract, Extract
Mr. Beer Booster              0.40 lb, Sugar, Other

BrewDemon™ Hellfire Deep Red Ale1.00 oz, Pellet, 5 minutes

BrewDemon™ 5g Dry Brewing Yeast1.00 unit, Yeast, High ABV: Temperature Range: 59°-75° F  Low attenuation  [Safbrew S-33]

Notes
-----
Recipe Notes:
Added half  a pack of Mr. Beer booster.

Batch Notes:
Lots of solid particles in the HME (bits of grain and hops).  They didn't settle out during fermentation.  Made bottling with the wand very difficult, ended up using just the spigot for 5 last bottles, which have some particles in them.  Taste testing draw after bottling had them as well, tasted fine but had to remove bits from my mouth as I didn't want to consume them.  Hope they settle when the bottles go in the fridge after conditioning.

************************************************************

Brewed on 2013/02/09.  This is the first time I've noticed solid particles (bits of grain and hops) in any of the HME that I've used.  Not sure if this is normal for Brew Demon HMEs or not.  Went with the brewing as normal, expecting them to settle out during the fermentation process.  This is a deluxe kit which includes HME and LME.  The HME can is smaller than a Mr. Beer HME (850g vs 550g), and theBrew Demon LME is bigger (550g vs 250g).  In the end, both end up with 1100g of malt, so it should be pretty comparable.  Brewed this in the LBK due to the LDC still holding the Cherry Wheat.

Update 2013/03/02:
Bottling day.  Started bottling as normal.  Part way though, the bottling wand started to slow down due to the accumulation of solid particles.  They didn't settle out during fermentation as I'd hoped.  Before I finished bottling I had to stop using the wand as it became totally blocked.  Removed the wand and finished the remaining 5 bottles or so directly from the spigot.  This means those bottles will have a fair bit of these particles in them.  Hopefully they will settle out once they are ready for the refrigerator.  In the meantime, I've contacted Brew Demon's customer service to see if this is normal.

Update 3012/03/06:
Sam at Brew Demon indicated what I experienced wasn't normal.  He's replacing the extract kit and also brewing up one himself (he's the owner of Brew Demon) to ensure the quality of that particular extract.  Top notch customer service!

0002 - Cherry Wheat

This is a Mr. Beer recipe that seems to get a lot of negative feed back on the forums.  The main complaints are lack of cherry flavor and being very cidery (due to all of the non-malt sugars, called adjuncts).  I figured I'd try going a little off recipe for this one.  I used only half of the pouch of booster, and added a pound of wheat DME.  I didn't add the pureed cherries until a week after primary fermentation started.  Here's the Qbrew take on my changes:

************************************************************
Cherry Wheat - Modified
-----------------------
Brewer: James
Style: Fruit Beer
Batch: 2.13 galExtract

Characteristics
---------------
Recipe Gravity: 1.064 OG
Recipe Bitterness: 16 IBU
Recipe Color: 5° SRM
Estimated FG: 1.016
Alcohol by Volume: 6.2%
Alcohol by Weight: 4.9%

Ingredients
-----------
Mr. Beer Booster              0.40 lb, Sugar, Other
Mr. Beer/Coopers Bavarian Weissbier1.87 lb, Extract, Extract
Muntons DME - Wheat  (60%/40%)1.00 lb, Extract, Extract
Oregon Fruit - Dark Cherries  0.94 lb, Adjunct, Other

Mr. Beer/Coopers Bavarian Weissbier1.00 oz, Pellet, 5 minutes

Mr. Beer Dry Ale Yeast        1.00 unit, Yeast, Temperature Range: 68°-76° F   2.0 GRAMS

Notes
-----
Recipe Notes:
Added 1 pound Mutons Wheat DME and half a pouch of booster.  Recipe called for no DME and a full pouch of booster.

Batch Notes:
Very cidery after taste at bottling.  Will condition for at least 6 weeks before sampling.
************************************************************

Brewing was pretty straightforward, brewed on 2013/02/02.  Have seen conflicting advice as to the need to boil the DME or not when not adding additional hops.  I opted to add it after the water boiled (and it almost bubbled over when I did so).  Next time I use it, I will boil it to see if it makes a difference in the final outcome of the batch.  ABV is a bit high for a wheat beer.  Should have left out the booster all together, but didn't start using Qbrew until after this batch was already fermenting.

Update 2013/02/23:
Bottled the batch today.  Really liking the conical fermenter.  Hardly any trub (sediment) at all in any of the bottles.  Tasted sample, had a strong cider bite to it due to the fruit sugars and booster.  Will need to let this one condition for at least 6 weeks before trying one.  Fermenter had a really strong cider smell to it even after soaking overnight and cleaning.  Soaked and cleaned it a second time which has greatly reduced the odor.

Conical Fermenter

During my ongoing reading and research, I discovered a fairly new company that is selling conical shaped fermenters that are more like the ones used in big brew houses.    This was back in early January. The company is Brew Demon at www.brewdemon.com.  Ordered one of their ferementers and a couple of refills to compare with Mr. Beer.  It will be referred to as the Little Demon Conical (LDC).  They held a promotion where you send in a piece of the LBK and they'll send you a LDC for just actual shipping costs.  Took them up on this offer since I had the old LBK that leaked and was replaced by Mr. Beer.

I made my first visit to the local home brew store (LHBS) and purchased some supplies.  I picked up some DME of various types, a bottling tree, a vinator and a few bits of helpful advice.  These will make bottling days much easier.

0001 - Classic American Light

My first batch was brewed on January 6, 2013.  I kept this one simple, and did it by the book to ensure good results and the intended taste.  Here's what's expected according to Qbrew:

************************************************************

Classic American Light
----------------------
Brewer: James
Style: Generic Ale
Batch: 2.13 galExtract

Characteristics
---------------
Recipe Gravity: 1.032 OG
Recipe Bitterness: 11 IBU
Recipe Color: 2° SRM
Estimated FG: 1.008
Alcohol by Volume: 3.1%
Alcohol by Weight: 2.4%

Ingredients
-----------
Mr. Beer/Coopers Classic American Light1.87 lb, Extract, Extract

Mr. Beer/Coopers Classic American Light1.00 oz, Pellet, 5 minutes

Mr. Beer Dry Ale Yeast        1.00 unit, Yeast, Temperature Range: 68°-76° F   2.0 GRAMS

Notes
-----
Recipe Notes:


Batch Notes:


************************************************************

Despite all my reading and research, there were some learning moments with this batch.  It all started with the no rinse sanitizer.  It is a bit harder to dissolve than I expected and I used water that was a bit cooler than it should have been.  I thought I got it mixed up well, put everything into the little brown keg (LBK) and let it sit for 10 minutes.  Took it all back out and put on a sanitized plate, and dumped the rest down the sink.  Then noticed a fair amount of undissolved sanitizer in the bottom of the LBK.  Got out what I could with my sanitized hand, and had to leave the rest as using anything else would have risked infecting the batch.  What was left will break down into simple minerals and provide food for the yeast, so it isn't anything to worry about.

The label on the can of HME gets soggy when you put it in hot water as the instructions state.  I'd recommend removing the label before opening the can.  I didn't, and the can opener shredded it.  Little bits of the label fell into the wort as I was emptying the contents of the can into the boiled water.  In a momentary panic over this, I reached in with my fingers to grab the bits.  In water that has just been boiling.  I don't recommend doing this.  Used a sanitized spatula to get out what I could, figured rest will settle during fermentation and not pose any issue.

Good thing I sanitized the lid of the HME before I opened it.  As I finished with the can opener, the lid fell into the HME and was a pain to get out.  That HME is quite sticky!  Next time, I'll have a sanitized butter knife on hand and slide it under the lid when it is about half way opened.  I'll use it to keep it from falling in, and it raise the lid up out of the way when ready to pour.  I leave just a little tab left on the lid, rather than fulling removing it.

You put refrigerated water into the LBK before adding the hot wort.  This both cools down the wort for pitching (adding) the yeast and prevents damage to the LBK as it isn't a heat resistant plastic.  After adding the hot wort, you top it off with more refrigerated water up to the 8.5 quart mark on the LBK.  My fridge is a bit lower than most, so the water was colder and made the resulting wort at the low end for pitching yeast. This slows down the yeast and takes longer to get a good fermentation going.  In the future I'll use cold water to start, add the wort, then top off with room temperature water to keep it from getting too cold.

Update 2013/01/26:
Batch bottled and ready for carbonation and conditioning at room temperature for a month.  Due to issues with the funnel and measuring spoon, I under primed each bottle.  I'm expecting the carbonation to be a bit week with this batch.  Discovered the LBK had been leaking around the spigot due to the molding seam.  Contacted Mr. Beer customer service who replaced the LBK.  The second one also leaked.  Ended up using fine grit sanding paper to smooth down the seam and stop the leak.

Update 2013/02/23:
Cracked open first bottle.  Has a good taste, no head and (as expected) light carbonation.  I expect the taste to get even better as the remaining bottles continue to condition.  Not much can be done for the carbonation at this point except learn from my mistake.  It is a bit darker in color and has more body than the typical light beer (Bud, Coors, etc).  It is a good segue beer for one that typically drinks one of the big corporate brewery's beers into the world of craft beers.

Friday, March 1, 2013

The Beginning of a New Hobby

It all started with Christmas, 2012, when I received a Mr. Beer home brewing kit as a gift from my parents.  I'd never considered home brewing before that point, even though I had a friend that had been doing so for years.  Now that I had a kit, I had a reason to give it a shot.

I read through all of the documentation that came with the kit, and watched the videos.  But the two week time frame Mr. Beer gave didn't sit right with me, based on past conversations I've had with my home brewing friend.  So I read, researched and read some more.  The community forum at the Mr. Beer website proved to be a valuable source of information.  There are some other home brew based forums out there, but they tend to look down on Mr. Beer kits and extract brewing in general.  Armed with my new found knowledge, I was ready to embark on my first batch, the Classic American Light that came with the kit.

I didn't decide to do this blog until I'd been brewing for a few months.  So the first several posts will be covering the past trying to catch up with current brewing activities.